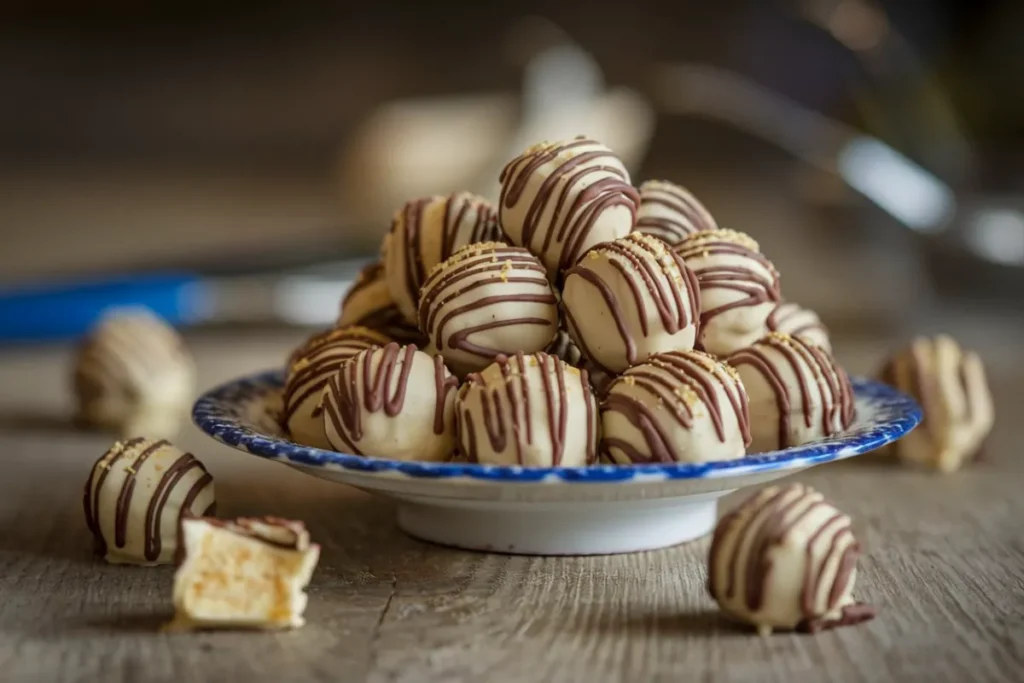
There’s something magical about the combination of chocolate, peanut butter, and the crunch of a Butterfinger candy bar. Now, imagine all those flavors rolled into a sweet, bite-sized dessert that doesn’t even require an oven! Butterfinger Balls are an easy and fun treat to make at home, and they’re sure to impress both kids and adults alike. Whether you’re preparing them for a party, a holiday dessert, or just because you’re craving something sweet, this recipe will deliver that perfect balance of texture and flavor.
What Are Butterfinger Balls?
Before diving into the recipe, let’s talk about what Butterfinger Balls actually are. These bite-sized treats are a combination of crushed Butterfinger candy bars, creamy peanut butter, and chocolate coating. The Butterfinger candies add that signature crisp crunch, while the peanut butter provides richness, and the chocolate makes everything come together in a decadent little package.
This no-bake dessert is super easy to prepare, making it a great option for when you’re short on time or just want to make something that doesn’t require complicated steps. With just a few ingredients and minimal effort, you’ll have a batch of Butterfinger Balls ready to enjoy in no time.

Ingredients for Butterfinger Balls
To make this simple yet delicious Butterfinger Balls recipe, you’ll need just a handful of basic ingredients. Let’s go over what you’ll need:
1. Crushed Butterfinger Bars (1 1/2 cups)
The star of the recipe is, of course, Butterfinger candy bars. You’ll need about 4-5 full-sized Butterfinger bars, crushed into small pieces. You can either chop them with a knife or place them in a plastic bag and crush them with a rolling pin. The goal is to break them down into small bits that will mix easily into the dough but still provide that signature crunch in every bite.
2. Creamy Peanut Butter (1 cup)
Peanut butter is essential for binding the crushed Butterfinger bits together and adding richness to the mixture. Use smooth, creamy peanut butter for the best results.
3. Powdered Sugar (1 1/2 cups)
Powdered sugar sweetens and helps firm up the mixture, making it easier to roll into balls. It also contributes to the smooth, melt-in-your-mouth texture of the final product.
4. Butter (1/2 cup, softened)
Butter adds extra richness and helps hold the mixture together. Make sure the butter is softened so it blends smoothly into the peanut butter and powdered sugar.
5. Vanilla Extract (1 teaspoon)
A touch of vanilla enhances the overall flavor of the Butterfinger Balls, adding a bit of warmth and depth.
6. Chocolate Chips (2 cups)
For the chocolate coating, you’ll need chocolate chips (semi-sweet or milk chocolate work best). You’ll melt these to dip the balls in, creating that delicious outer shell.
7. Optional Toppings
If you want to add a little extra flair, consider topping your Butterfinger Balls with crushed Butterfinger pieces, sprinkles, or even a drizzle of white chocolate.
Step-by-Step Guide to Making Butterfinger Balls
Now that you have your ingredients ready, let’s walk through how to make these delectable Butterfinger Balls. This no-bake recipe is straightforward and quick, so you’ll have a batch ready in less than an hour.
Step 1: Crush the Butterfingers
Start by crushing your Butterfinger candy bars into small bits. You want the pieces to be small enough to mix into the dough but large enough to maintain that signature crunch in every bite. Place the crushed Butterfinger pieces in a bowl and set them aside.
Step 2: Mix the Dough
In a large mixing bowl, combine the softened butter, peanut butter, and vanilla extract. Use a hand mixer or a wooden spoon to blend them together until the mixture is smooth and creamy. Slowly add the powdered sugar, mixing until it’s fully incorporated and the mixture is smooth and slightly thickened.
Step 3: Add the Crushed Butterfingers
Once the peanut butter mixture is ready, fold in the crushed Butterfinger pieces. Stir until the pieces are evenly distributed throughout the mixture. This is what gives your Butterfinger Balls their crunch and flavor, so make sure every ball gets some of that delicious Butterfinger goodness.
Step 4: Shape the Balls
Using your hands or a small cookie scoop, roll the mixture into bite-sized balls. Each ball should be about 1 inch in diameter. Place the rolled balls on a baking sheet lined with parchment paper. Once all the balls are shaped, refrigerate them for about 30 minutes to firm up.
Step 5: Melt the Chocolate
While the balls are chilling, melt the chocolate chips in a microwave-safe bowl. Heat them in 30-second intervals, stirring in between, until the chocolate is fully melted and smooth. Be careful not to overheat the chocolate, as it can seize and become difficult to work with.
Step 6: Dip the Balls in Chocolate
Once the balls are firm, take them out of the fridge and dip each one into the melted chocolate. You can use a fork or toothpicks to dip the balls, making sure they’re fully coated in chocolate. Place the dipped balls back onto the parchment-lined baking sheet.
Step 7: Add Optional Toppings
If you want to add toppings, sprinkle crushed Butterfinger bits, sprinkles, or drizzle white chocolate over the top of each ball before the chocolate sets.
Step 8: Let the Balls Set
Allow the chocolate coating to harden by placing the balls in the fridge for about 15-20 minutes. Once the chocolate is firm, your Butterfinger Balls are ready to enjoy!
Fun Variations of Butterfinger Balls
While the classic Butterfinger Balls recipe is delicious on its own, there are plenty of ways to switch things up if you want to get creative. Here are a few fun variations you can try:
1. Peanut Butter Crunch Balls
For an extra crunchy variation, mix in some crispy rice cereal with the crushed Butterfinger pieces. This adds even more texture and crunch to the balls, making them a satisfying snack.
2. Chocolate Peanut Butter Balls
If you’re a chocolate lover, try adding cocoa powder to the peanut butter mixture for a deeper, richer chocolate flavor. You can also dip the balls in dark chocolate instead of milk chocolate for a more intense taste.
3. White Chocolate Butterfinger Balls
For a twist on the classic, swap out the regular chocolate chips for white chocolate. The sweetness of white chocolate pairs beautifully with the crunchy Butterfinger pieces, creating a slightly different flavor profile that’s just as irresistible.
4. Coconut Butterfinger Balls
If you enjoy the taste of coconut, you can add shredded coconut to the peanut butter mixture or sprinkle it over the top of the balls before the chocolate sets. The tropical flavor of coconut pairs surprisingly well with the peanut butter and Butterfinger pieces.
5. Holiday-Themed Butterfinger Balls
These Butterfinger Balls are a hit during the holidays! You can customize the recipe with festive toppings, such as red and green sprinkles for Christmas, or pastel-colored candies for Easter. They also make for a great edible gift.
Serving Ideas for Butterfinger Balls
While these Butterfinger Balls are delicious on their own, there are plenty of ways to serve and enjoy them. Here are a few ideas to make your next batch extra special:
1. Dessert Platter
Arrange your Butterfinger Balls on a dessert platter alongside other no-bake treats like brownies, cookies, or fudge. They make an excellent addition to a dessert buffet at parties or family gatherings.
2. Gift Boxes
Butterfinger Balls make great gifts for friends and family. Package them in small gift boxes or cellophane bags tied with a ribbon. They’re a thoughtful, homemade treat that’s perfect for birthdays, holidays, or special occasions.
3. Ice Cream Topping
Chop up a few Butterfinger Balls and sprinkle them over vanilla or chocolate ice cream. The crunchy texture and rich flavor will turn a simple bowl of ice cream into a decadent dessert.
4. Party Favors
If you’re hosting a party, you can package Butterfinger Balls individually and give them out as party favors. Place each ball in a small cupcake liner and arrange them in a decorative box for guests to take home.
Storing and Freezing Butterfinger Balls
If you’re making a large batch of Butterfinger Balls or want to prepare them ahead of time, you’ll need to know how to store them properly. Here are some tips for keeping your treats fresh:
Storing in the Fridge
Butterfinger Balls can be stored in an airtight container in the fridge for up to a week. Just make sure they’re fully set before stacking them to prevent the chocolate from sticking together.
Freezing Butterfinger Balls
If you want to make them ahead of time or save some for later, these balls freeze beautifully. Place them in a single layer on a baking sheet and freeze until firm, then transfer them to a freezer-safe container. They’ll keep for up to 3 months in the freezer. To enjoy, simply let them thaw in the fridge for a few hours before serving.
Frequently Asked Questions (FAQ)
1. Can I use chunky peanut butter instead of creamy?
Yes! If you prefer more texture in your Butterfinger Balls, chunky peanut butter will add an extra crunch to the recipe.
2. Can I substitute other candy bars for Butterfingers?
You can experiment with other candy bars if you’d like! Try using Reese’s, Crunch bars, or even Snickers for a different take on the recipe.
3. How do I prevent the chocolate from seizing when melting?
To prevent chocolate from seizing, make sure to melt it slowly and avoid getting any water in the bowl. Use a microwave-safe bowl and heat the chocolate in 30-second intervals, stirring in between.
4. Can I make Butterfinger Balls without powdered sugar?
Powdered sugar helps firm up the mixture and adds sweetness. If you want to reduce the sugar, you can use less, but the consistency may be softer.
5. How long do Butterfinger Balls last in the fridge?
Stored in an airtight container, Butterfinger Balls will stay fresh for up to a week in the fridge.
Conclusion: Butterfinger Balls, the Perfect No-Bake Treat
There’s something undeniably satisfying about the combination of peanut butter, chocolate, and the crunchy goodness of Butterfinger candy bars. This Butterfinger Balls recipe is the perfect no-bake dessert for any occasion. Whether you’re making them for a party, a holiday gathering, or just to satisfy your sweet tooth, these little treats are sure to be a hit.
The best part? They’re incredibly easy to make, with no oven required! You can whip up a batch in under an hour, and they’re versatile enough to customize with your favorite ingredients and toppings. So, next time you’re in the mood for something sweet, give these Butterfinger Balls a try—you won’t be disappointed!
